
Image-to-Image Translation with FLUX.1: Intuition and Tutorial
Generate new images based on existing images using diffusion models.
This post guides you through generating new images based on existing ones and textual prompts. This technique, presented in a paper called SDEdit: Guided Image Synthesis and Editing with Stochastic Differential Equations is applied here to FLUX.1.
First, we’ll briefly explain how latent diffusion models work. Then, we’ll see how SDEdit modifies the backward diffusion process to edit images based on text prompts. Finally, we’ll provide the code to run the entire pipeline.
Background: Latent Diffusion
Latent diffusion performs the diffusion process in a lower-dimensional latent space. Let’s define latent space:
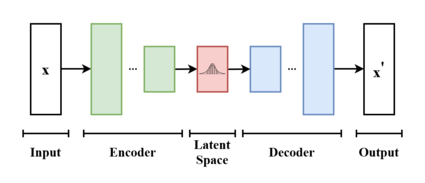
A variational autoencoder (VAE) projects the image from pixel space (the RGB-height-width representation humans understand) to a smaller latent space. This compression retains enough information to reconstruct the image later. The diffusion process operates in this latent space because it’s computationally cheaper and less sensitive to irrelevant pixel-space details.
Now, lets explain latent diffusion:
The diffusion process has two parts:
- Forward Diffusion: A scheduled, non-learned process that transforms a natural image into pure noise over multiple steps.
- Backward Diffusion: A learned process that reconstructs a natural-looking image from pure noise.
Note that the noise is added to the latent space and follows a specific schedule, from weak to strong in the forward process.
Noise is added to the latent space following a specific schedule, progressing from weak to strong noise during forward diffusion. This multi-step approach simplifies the network’s task compared to one-shot generation methods like GANs. The backward process is learned through likelihood maximization, which is easier to optimize than adversarial losses.
Text Conditioning
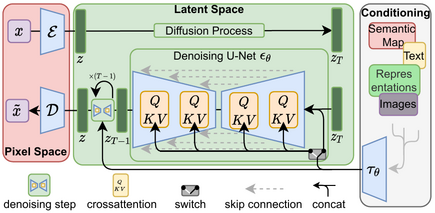
Generation is also conditioned on extra information like text, which is the prompt that you might give to a Stable diffusion or a Flux.1 model. This text is included as a “hint” to the diffusion model when learning how to do the backward process. This text is encoded using something like a CLIP or T5 model and fed to the UNet or Transformer to guide it towards the right original image that was perturbed by noise.
SDEdit
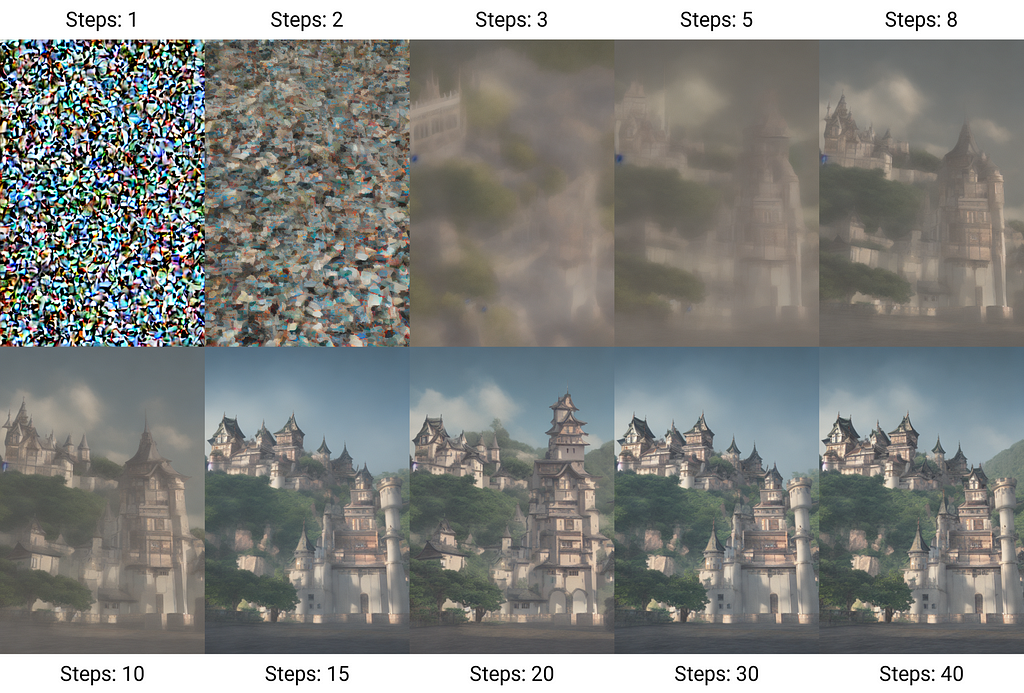
The idea behind SDEdit is simple: In the backward process, instead of starting from full random noise like the “Step 1” of the image above, it starts with the input image + a scaled random noise, before running the regular backward diffusion process. So it goes as follows:
- Load the input image, preprocess it for the VAE
- Run it through the VAE and sample one output (VAE returns a distribution, so we need the sampling to get one instance of the distribution).
- Pick a starting step t_i of the backward diffusion process.
- Sample some noise scaled to the level of t_i and add it to the latent image representation.
- Start the backward diffusion process from t_i using the noisy latent image and the prompt.
- Project the result back to the pixel space using the VAE.
- Voila !
Show me the code 🔽
Here is how to run this workflow using diffusers:
First, install dependencies ▶️
pip install git+https://github.com/huggingface/diffusers.git optimum-quanto
For now, you need to install diffusers from source as this feature is not available yet on pypi.
Next, load the FluxImg2Img pipeline ▶️
import os

from diffusers import FluxImg2ImgPipeline
from optimum.quanto import qint8, qint4, quantize, freeze
import torch
from typing import Callable, List, Optional, Union, Dict, Any

from PIL import Image
import requests
import io

MODEL_PATH = os.getenv("MODEL_PATH", "black-forest-labs/FLUX.1-dev")

pipeline = FluxImg2ImgPipeline.from_pretrained(MODEL_PATH, torch_dtype=torch.bfloat16)

quantize(pipeline.text_encoder, weights=qint4, exclude="proj_out")
freeze(pipeline.text_encoder)

quantize(pipeline.text_encoder_2, weights=qint4, exclude="proj_out")
freeze(pipeline.text_encoder_2)

quantize(pipeline.transformer, weights=qint8, exclude="proj_out")
freeze(pipeline.transformer)

pipeline = pipeline.to("cuda")

generator = torch.Generator(device="cuda").manual_seed(100)
This code loads the pipeline and quantizes some parts of it so that it fits on an L4 GPU available on Colab.
Now, lets define one utility function to load images in the correct size without distortions ▶️
def resize_image_center_crop(image_path_or_url, target_width, target_height):
    """
    Resizes an image while maintaining aspect ratio using center cropping.
    Handles both local file paths and URLs.

    Args:
        image_path_or_url: Path to the image file or URL.
        target_width: Desired width of the output image.
        target_height: Desired height of the output image.

    Returns:
        A PIL Image object with the resized image, or None if there's an error.
    """
    try:
        if image_path_or_url.startswith(('http://', 'https://')):  # Check if it's a URL
            response = requests.get(image_path_or_url, stream=True)
            response.raise_for_status()  # Raise HTTPError for bad responses (4xx or 5xx)
            img = Image.open(io.BytesIO(response.content))
        else:  # Assume it's a local file path
            img = Image.open(image_path_or_url)

        img_width, img_height = img.size

        # Calculate aspect ratios
        aspect_ratio_img = img_width / img_height
        aspect_ratio_target = target_width / target_height

        # Determine cropping box
        if aspect_ratio_img > aspect_ratio_target:  # Image is wider than target
            new_width = int(img_height * aspect_ratio_target)
            left = (img_width - new_width) // 2
            right = left + new_width
            top = 0
            bottom = img_height
        else:  # Image is taller or equal to target
            new_height = int(img_width / aspect_ratio_target)
            left = 0
            right = img_width
            top = (img_height - new_height) // 2
            bottom = top + new_height

        # Crop the image
        cropped_img = img.crop((left, top, right, bottom))

        # Resize to target dimensions
        resized_img = cropped_img.resize((target_width, target_height), Image.LANCZOS)

        return resized_img

    except (FileNotFoundError, requests.exceptions.RequestException, IOError) as e:
        print(f"Error: Could not open or process image from '{image_path_or_url}'.  Error: {e}")
        return None
    except Exception as e: #Catch other potential exceptions during image processing.
        print(f"An unexpected error occurred: {e}")
        return None
Finally, lets load the image and run the pipeline ▶️
url = "https://images.unsplash.com/photo-1609665558965-8e4c789cd7c5?ixlib=rb-4.0.3&q=85&fm=jpg&crop=entropy&cs=srgb&dl=sven-mieke-G-8B32scqMc-unsplash.jpg"
image = resize_image_center_crop(image_path_or_url=url, target_width=1024, target_height=1024)
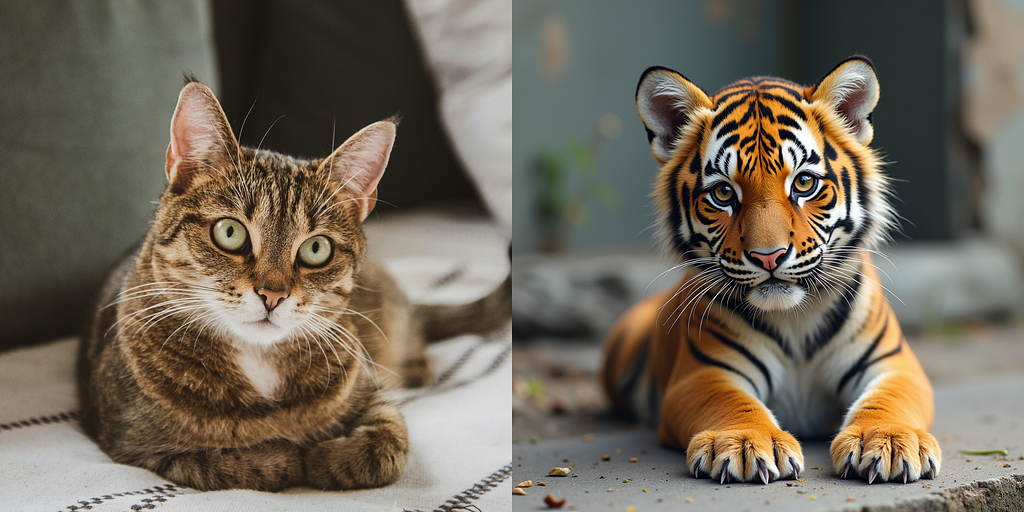
prompt = "A picture of a Tiger"
image2 = pipeline(prompt, image=image, guidance_scale=3.5, generator=generator, height=1024, width=1024, num_inference_steps=28, strength=0.9).images[0]
This transforms the following image:
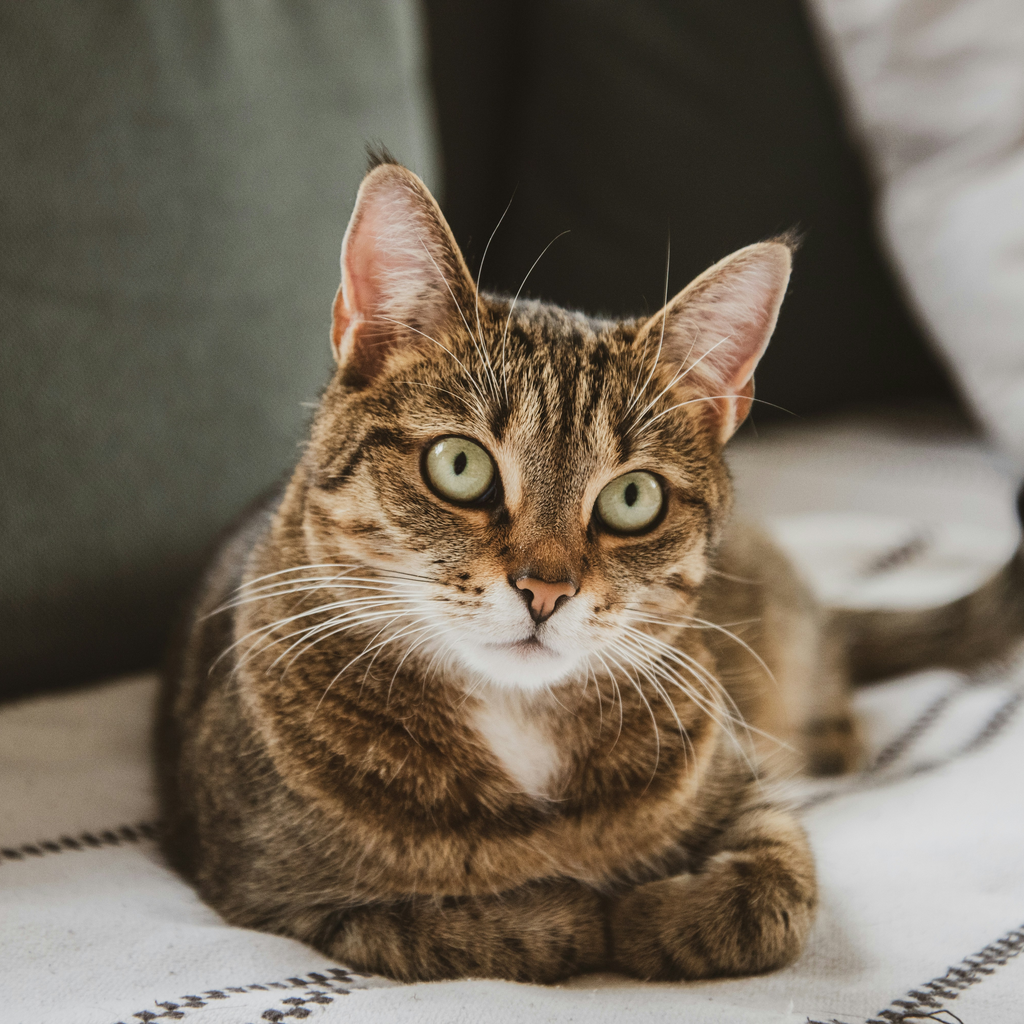
To this one:
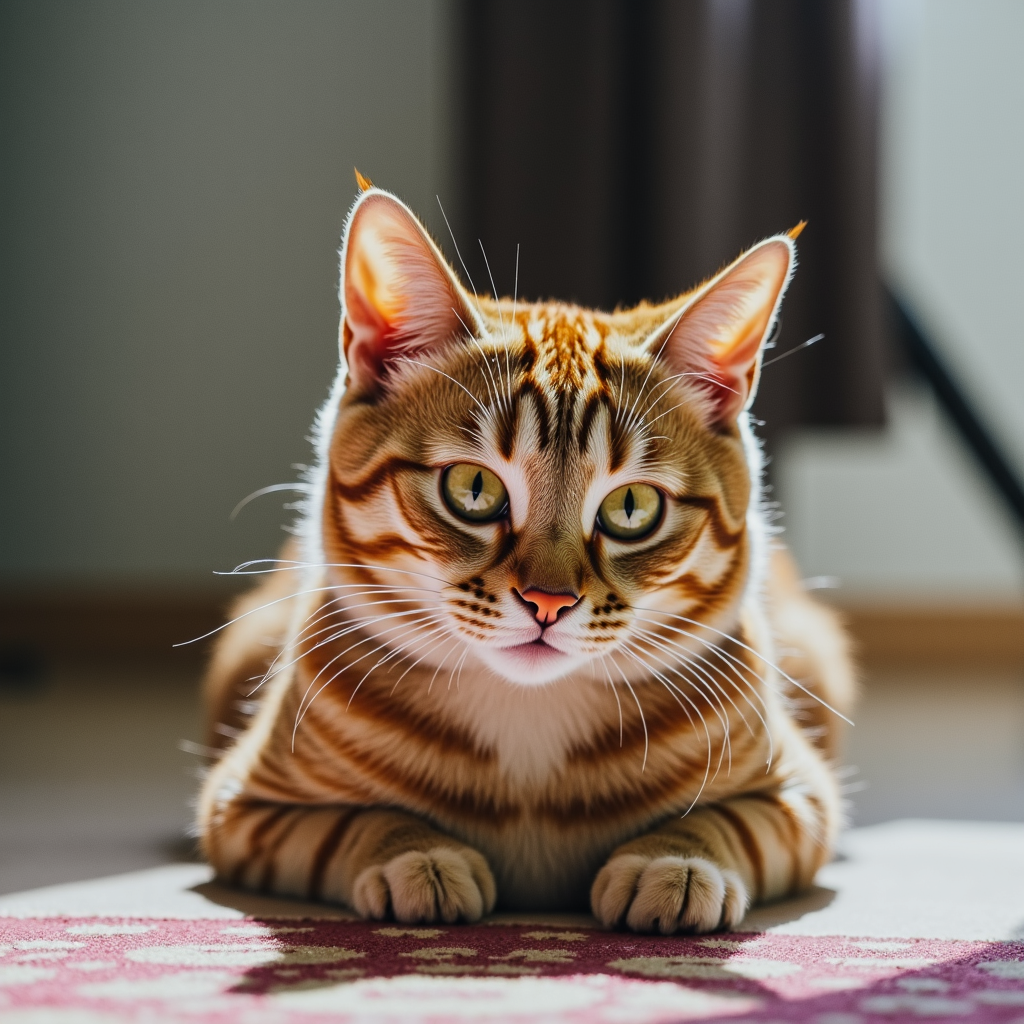
You can see that the cat has a similar pose and shape as the original cat but with a different color carpet. This means that the model followed the same pattern as the original image while also taking some liberties to make it more fitting to the text prompt.
There are two important parameters here:
- The num_inference_steps: It is the number of de-noising steps during the backwards diffusion, a higher number means better quality but longer generation time
- The strength: It control how much noise or how far back in the diffusion process you want to start. A smaller number means little changes and higher number means more significant changes.
Conclusion
Now you know how Image-to-Image latent diffusion works and how to run it in python. In my tests, the results can still be hit-and-miss with this approach, I usually need to change the number of steps, the strength and the prompt to get it to adhere to the prompt better. The next step would to look into an approach that has better prompt adherence while also keeping the key elements of the input image.
Full code: https://colab.research.google.com/drive/1GJ7gYjvp6LbmYwqcbu-ftsA6YHs8BnvO
Image-to-Image Translation with FLUX.1: Intuition and Tutorial was originally published in Towards Data Science on Medium, where people are continuing the conversation by highlighting and responding to this story.
from Datascience in Towards Data Science on Medium https://ift.tt/TA5iW8F
via IFTTT


