The Invisible Bug That Broke My Automation: How OCR Changed The Game
The evolution of AI in test automation: from locators to generative AI (Part 3)

It’s 10:00 AM on a quiet weekday and I’m staring at yet another failed test report.
This wasn’t just any test case , it was one I had reviewed and debugged last week after some UI changes. And now it had mysteriously failed. Again…
The error? Visibily there is no error.
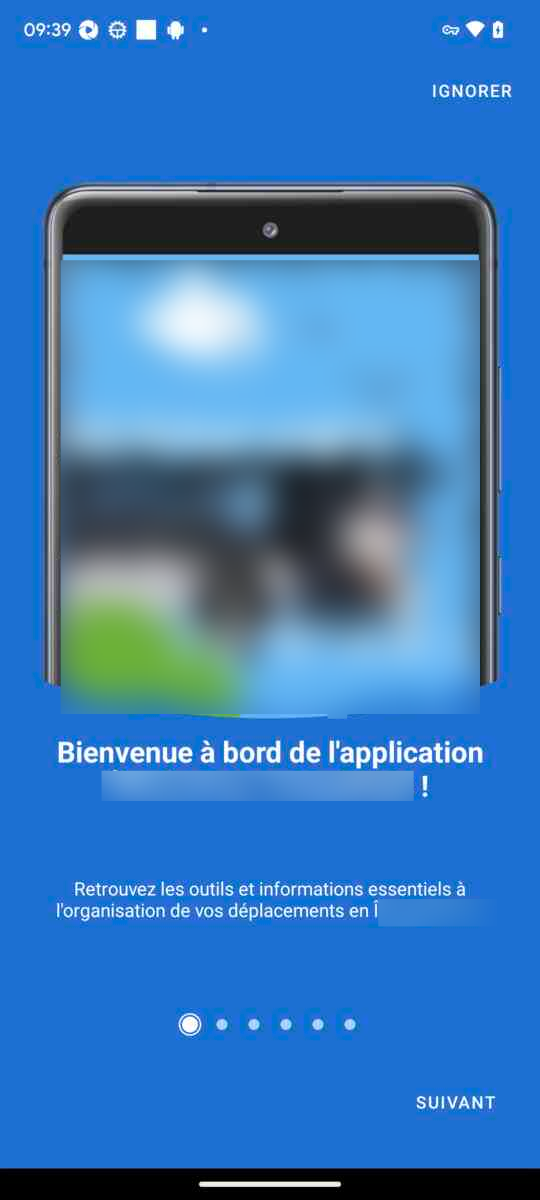
What should have been: this text should be displayed on the welcome screen:
“Bienvenue à bord de l’application my-app-name!”
I made a look on the app screenshot and the text was correctly displayed.. there was no issue:

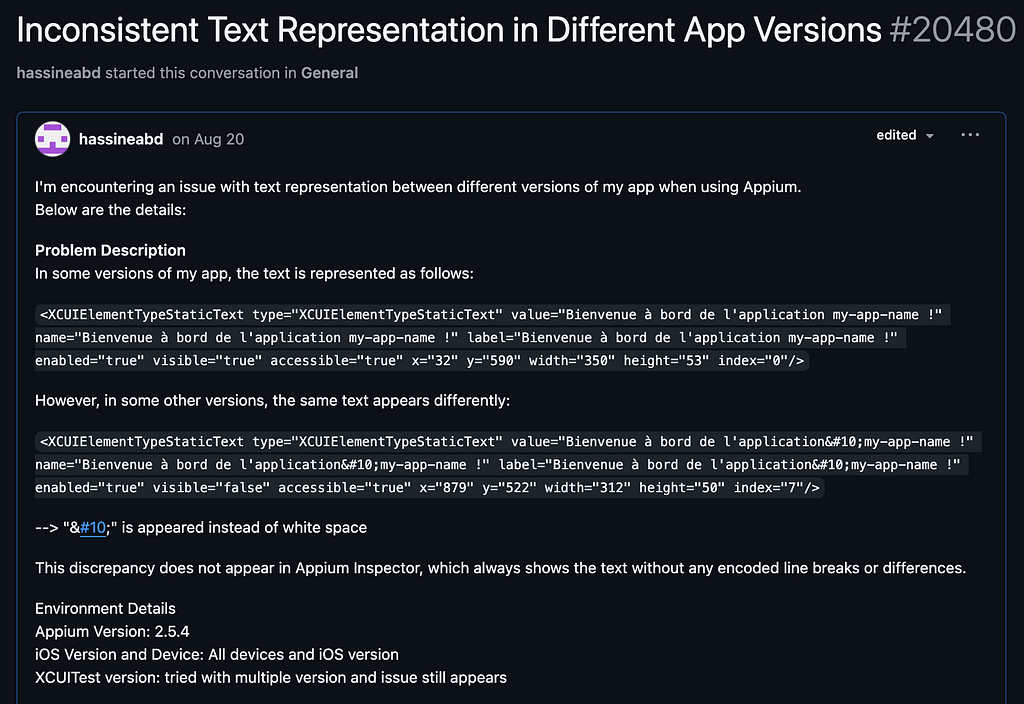
I decided to make a look on the Appium XML :
<XCUIElementTypeStaticText type="XCUIElementTypeStaticText"
value="Bienvenue à bord de l'application my-app-name !"
enabled="true" visible="false" accessible="true" x="879" y="522"
width="312" height="50" index="7"/>
That little “ “ — a sneaky newline character — had crept into the XML output of my app. It didn’t show up in the Appium Inspector before, and my developers swore nothing had changed in the app’s codebase. Yet here I was trying to figure out why the same test worked flawlessly in one version of the app but failed miserably in another.
I could not help but think: “How much longer are we going to fight with such brittle text representation? “
The Apostrophe That Broke Everything
This wasn’t just about a single test case; while reading the report I found more failed tests, I took a look at the screenshot, and the text is the same as it is expected. I check the Appium XML and I found this:
# Exemple of the expected text :
That's not a big deal
The appium XML:
<XCUIElementTypeStaticText type="XCUIElementTypeStaticText"
value="That's not a big deam"
enabled="true" visible="false" accessible="true" x="879" y="522"
width="312" height="50" index="7"/>
Did you spot the difference? I bet not.
It is not the same apostrophe: ‘ is different than ’
- ' (Apostrophe or single straight quote): this is the standard ASCII single quote (code 39) and it is known as a straight quote, commonly used in programming and text files.
- ’ (Right single quotation mark): it is a typographic quotation mark and it is part of the extended Unicode character set (code U+2019). It is often used in proper typesetting (referred to as a curly quote or smart quote), commonly used in natural language text to indicate possession (e.g. John’s book).
Raising the Issue on GitHub
I launched the same tests on previous version of the app where all tests were Passed.
Guess what?
The tests passed. Should be something changed in the App. But this doesn’t seem to be fair, Appium supposed to handle text encoding problems. I raised the issue on GitHub and highlighted this point.

Looking for a Better Solution
For me, this was a symptom of a bigger problem.
I realized that we need something more robust, or maybe hit the problem with different approach… directly thought about how to make automation that doesn’t rely on XML trees and locators... Nice ! But computer vision techniques and pixel to pixel will not fit many needs of mine.
This thought led me to explore OCR libraries. I have used some of it before but it was a different context. I know that it is not that robust for all languages, text styles etc... but I wondered: could these OCR libraries help bridge the gap between what the app displays and what the test sees?
I went through different approach, libraries and parameters to explore and test what it can bring to the game, and what I discovered changed how I approach test automation today.
Let me share some of those insights, and how you can apply them to your own projects.
I have written about the locator issues on the first part (pinned in my profile), second article is about computer vision techniques, hit the follow button to keep up with my articles, I will be talking about autopilot testing and generative AI doing test assertions (currently working on a research paper on a close subject; feel free to connect on X if you have similar interest.)
2. Starting by the basics
OCR works by analyzing an image, identifying text patterns, and converting those patterns into machine-readable characters.
Here’s the magic broken down (generally speaking):
- Image processing: OCR tools preprocess the image to enhance text clarity by converting it to grayscale, removing noise, or sharpening edges.
- Text detection: The tool identifies regions within the image that likely contain text.
- Character recognition: in this step OCR matches the shapes of individual characters against its built-in or trained datasets to determine what each character is.
- Output generation: the recognized characters are output as machine readable formats (plain text, JSON, CSV...).
There’s a wealth of OCR tools out there; here is a quick review:
- Tesseract OCR: An open-source powerhouse that’s been around for years and supports over 100 languages... lightweight, customizable, and great for text-heavy applications.
- OpenCV’s OCR Modules: primarily known for image processing, but it integrates OCR capabilities.
- Google Vision API: If you’re looking for top-notch accuracy with minimal setup, this cloud-based OCR tool leverages AI to handle everything from noisy images to multi-language text.
Building My OCR Methods
It all started with a simple goal: identify a specific text phrase in a screenshot, locate it, and highlight it. At first glance, it seemed like a straightforward task. Just run OCR on the image, find the text, and draw a box around it, right?
Not quite.
Let me walk you through how I built a OCRAutomator class using OCR, why it’s not as simple as it sounds, and how we solve the challenges step by step.
Step 1: Extracting Text from an Image
The first step was to extract text from the screenshot using OCR. For this, I used Tesseract. It can break down an image into individual characters and return their locations.
Here’s the code that does the heavy lifting:
def perform_ocr(self):
  self.ocr_data = pytesseract.image_to_data(self.image, output_type=Output.DICT)
  return [text.strip() for text in self.ocr_data['text'] if text.strip()]
With this function, I can now feed the screenshot taken while tests run into the OCR engine and retrieve the text along with its bounding boxes.

But there was an immediate problem: the text was fragmented, and a single phrase like “Hello, world!” was often split into separate words or even individual characters.
Step 2: Grouping Words into Phrases
To make sense of the OCR output, I needed to group words into coherent phrases… Words on the same line should be considered together but only if they were close enough to belong to the same phrase.
For this, I wrote a function that checks if words are on the same line and within a reasonable horizontal distance:
def group_words_into_phrases(self, max_distance=20):
    """Group OCR words into phrases based on line number and proximity."""
    phrases = []
    current_phrase = []
    for i in range(len(self.ocr_data['text'])):
            if not self.ocr_data['text'][i].strip():
                if current_phrase:
                    phrases.append(current_phrase)
                    current_phrase = []
                continue
            if not current_phrase:
                current_phrase.append(i)
            else:
                prev_idx = current_phrase[-1]
                # Check if the words are on the same line and close enough
                same_line = (self.ocr_data['line_num'][i] == self.ocr_data['line_num'][prev_idx])
                distance = self.ocr_data['left'][i] - (self.ocr_data['left'][prev_idx] + self.ocr_data['width'][prev_idx])
                if same_line and distance <= max_distance:
                    current_phrase.append(i)
                else:
                    phrases.append(current_phrase)
                    current_phrase = [i]
        if current_phrase:
            phrases.append(current_phrase)
        return phrases
With this, I could finally reconstruct phrases like “Welcome to the app” from scattered words. This was critical for accurately finding the text correctly especially if I’am willing to click on it later.
Step 3: Highlighting the Target Phrase
Now came a fun part: visually highlighting the text in the image for logging purpose and facilitating later debugging. Once the words are grouped into phrases, I could calculate the bounding box of a phrase by taking the minimum and maximum coordinates of its words.
def calculate_bounding_box(self, phrase_indices):
    """Calculate the bounding box of a phrase."""
    x0 = min(self.ocr_data['left'][i] for i in phrase_indices)
    y0 = min(self.ocr_data['top'][i] for i in phrase_indices)
    x1 = max(self.ocr_data['left'][i] + self.ocr_data['width'][i] for i in phrase_indices)
    y1 = max(self.ocr_data['top'][i] + self.ocr_data['height'][i] for i in phrase_indices)
    return x0, y0, x1, y1

def highlight_phrase(self, target_phrase, output_path, highlight_color="red"):
    """Highlight the target phrase in the image and save the result."""
    phrases = self.group_words_into_phrases()
    draw = ImageDraw.Draw(self.image)
    for phrase_indices in phrases:
        phrase_text = " ".join(self.ocr_data['text'][i].strip() for i in phrase_indices)
        if target_phrase.lower() in phrase_text.lower():
            x0, y0, x1, y1 = self.calculate_bounding_box(phrase_indices)
            draw.rectangle([x0, y0, x1, y1], outline=highlight_color, width=3)
    self.image.save(output_path)
Step 4: Testing the Solution
Finally, it was time to test it.
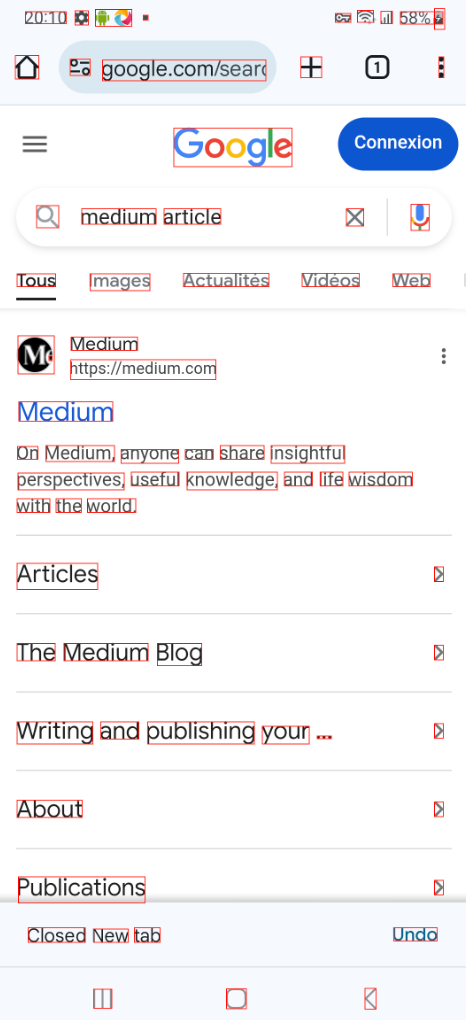
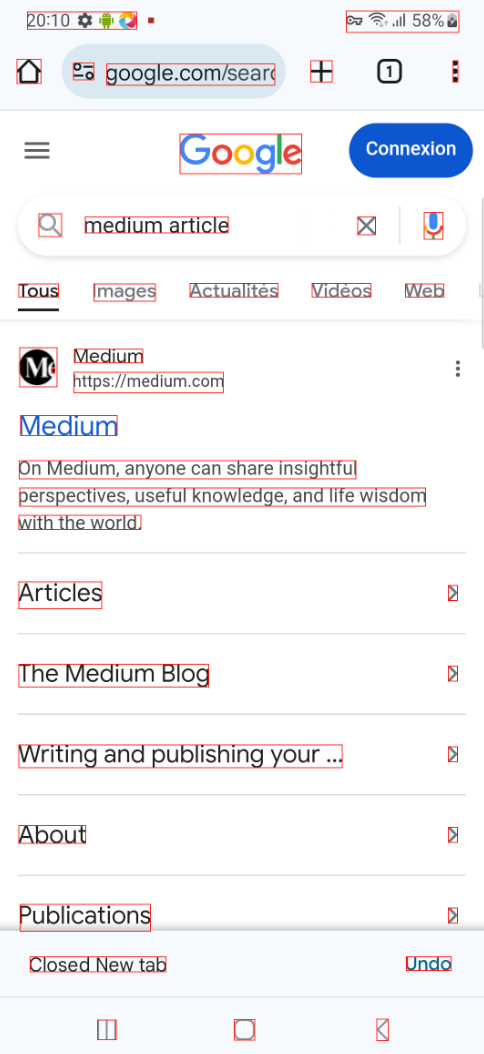
And just like that, the target text was boxed and highlighted in red, making it easy to validate its presence visually.

Using OCR for Automation
Finding and highlighting text in an image is good step but that doesn’t directly serve automation. Our purpose is to interact with the app by clicking text, verifying its presence, or waiting for it to appear etc…
Let’s add some Appium (for my case , since i’am working on mobile apps) so that makes the OCRAutomator class useful for test automation.
Clicking on Text
The first task was enabling interactions with text . Quite simple: we detect the text using OCR, get the coordinates , then calculate the center of those coordinates ( bounding box coordinates of the detected text). Using Appium TouchAction I can do a click:
from appium.webdriver.common.touch_action import TouchAction
def click_on_text(self, target_phrase, driver):
    """
    Find the target text and click it using Appium TouchAction.
    """
    self.perform_ocr()
    phrases = self.group_words_into_phrases()
    for phrase_indices in phrases:
        phrase_text = " ".join(self.ocr_data['text'][i].strip() for i in phrase_indices)
        if target_phrase.lower() in phrase_text.lower():
            center_x, center_y = self.calculate_text_center(phrase_indices)
            TouchAction(driver).tap(x=center_x, y=center_y).perform()
            print(f"Clicked on '{target_phrase}' at ({center_x}, {center_y})")
            return
    raise ValueError(f"Text '{target_phrase}' not found in the image.")
With this, I could now click on any visible text, bypassing the need for brittle locators.
Waiting for Text to Appear
Sometimes, the text doesn’t load instantly. To verify the text display, I use a simple wait_until_text_displayed function using the existing OCR logic:
import time
def wait_until_text_displayed(self, target_phrase, driver, timeout=10):
    """
    Wait until the target text is visible within the given timeout.
    """
    start_time = time.time()
    while time.time() - start_time < timeout:
        self.perform_ocr()
        for text in self.ocr_data['text']:
            if target_phrase.lower() in text.lower():
                print(f"Text '{target_phrase}' found!")
                return True
        time.sleep(1)
    raise TimeoutError(f"Text '{target_phrase}' not displayed within {timeout} seconds.")
this ensures that the test doesn’t proceed until the target text is confirmed visible on the screen.
Final Thoughts
What we have seen in this article is OCR using the Pytesseract library, which is lightweight and easy to implement. I highly encourage you to explore models-based OCR , EasyOCR library, etc. — it could open the door to more robust and scalable solutions for more complex cases.
Follow to read the next articles about generative AI in test automation. You can see my previous articles as well:
- The Evolution of AI in Test Automation: From Locators to Generative AI ( part 2 )
- The Evolution of AI in Test Automation: From Locators to Generative AI ( part 2 )
The Invisible Bug That Broke My Automation: How OCR Changed The Game was originally published in Towards Data Science on Medium, where people are continuing the conversation by highlighting and responding to this story.
from AI in Towards Data Science on Medium https://ift.tt/ud9i3S1
via IFTTT


