Scaling Segmentation with Blender: How to Automate Dataset Creation
A Step-by-Step Guide to Generating Synthetic Data for Training AI Models

If you have ever trained a segmentation model for a new project, you probably know it’s not about the model. It’s about the data.
Collecting images is often straightforward; you can usually find plenty on platforms like Unsplash, or even use Generative AI tools such as Stable Diffusion to generate more:
How to Train an Instance Segmentation Model with No Training Data
The main challenge usually lies in labeling. Annotating images for segmentation is highly time-consuming. Even with advanced tools like SAM2 by Meta, creating a fully annotated, robust, and diverse dataset still requires considerable time.
In this article, we’ll explore another, often less explored option: using 3D tools, such as Blender. Indeed, 3D engines are increasingly powerful and realistic. Moreover, they offer a compelling advantage: the ability to generate labels automatically while creating the dataset, eliminating the need for manual annotation.
In this article, we’ll outline a complete solution for creating a hand segmentation model, broken down into the following key parts:
- Generating hands with Blender and how to get diversity in hand posture, location and skin tones
- Generating a dataset using the generated Blender images and selected background images, using OpenCV
- Training and evaluating the model with PyTorch
Of course, all the code used in this post is fully available and reusable, in this GitHub repository.
Generating the Hands
To generate images of hands, let’s use Blender. I am not an expert with this type of tool, but it offers some highly useful features for our purpose:
- It’s free — no commercial license, anyone can download and use it immediately
- There is a great community and many models can be found online, some are free, some are not
- Finally, it includes a Python API, enabling the automation of image generation with various features
As we will see, those features are quite useful, and will allow us to make synthetic data fairly easily. To ensure sufficient diversity, we will explore how to automatically randomize the following parameters in our generated hands:
- The finger positions: we want to have images of hands in many different positions
- The camera position: we want to have images of hands from various perspectives
- The skin tone: we want diversity in the skin tone, to make the model robust enough
N.B.: The method proposed here is not free of any potential bias based on skin tone and does not claim to be bias-free. Any product based on this method must be carefully evaluated against any ethical bias.
Before diving into these steps, we need a 3D model of a hand. There are many models on websites such as Turbosquid, but I have used a freely available hand model that one can find here. If you open this file with Blender, you will get something like the following screenshot.
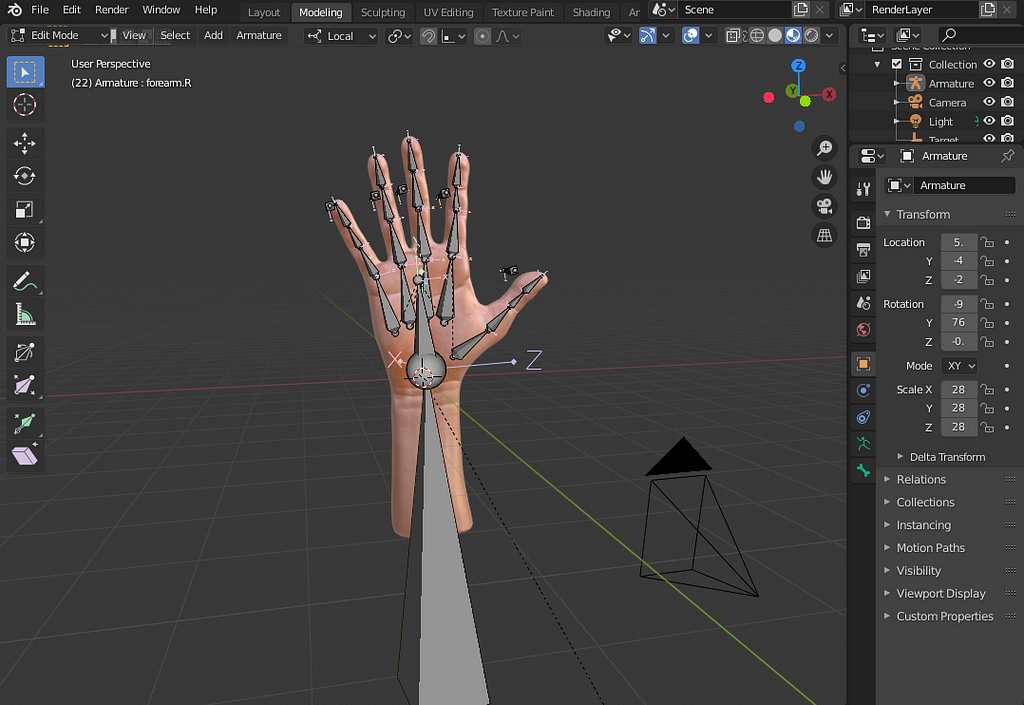
As shown, the model includes not only the hand’s shape and texture but also a bone structure, enabling hand movement simulation. Let’s work from that to get a diverse set of hands by playing with positions of fingers, skin tones and camera position.
Modifying Fingers Positions
The first step is ensuring a diverse yet realistic set of finger positions. Without delving into too many details (as this relates more to Blender itself), we need to create controllers for movement and impose constraints on permissible movements. Basically, we don’t want fingers to fold backward or to bend in unrealistic directions. Fore more details on these steps, refer to this YouTube tutorial, which helped me implement them with minimal effort.
Once the Blender file is well set with the right constraints, we can use a Python script to automate any finger position:
As we can see, all we do is randomly updating the locations of controllers, allowing to move around the fingers under constraints. With the right set of constraints, we get finger positions that look like the following:
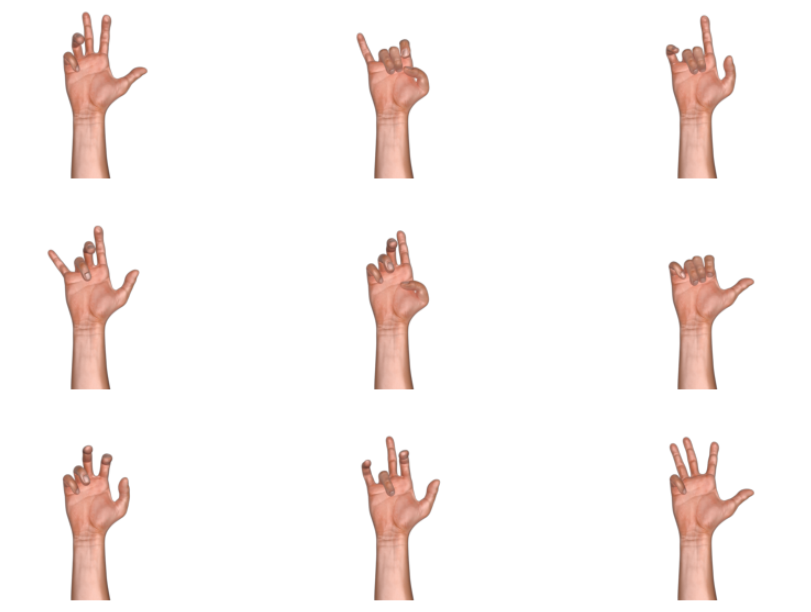
This produces realistic and diverse finger positions, ultimately enabling the generation of a varied set of hand images. Now, let’s play with the skin tone.
Modifying the Skin Tone
When creating a new image dataset featuring people, one of the most challenging aspects can be achieving a wide enough representation of skin tones. Ensuring models work efficiently across all skin tones without bias is a critical priority. Although I do not claim to fix any bias, the method I propose here allows to have a workaround solution by automatically changing the skin tone.
N.B.: This method does not claim to make models free of any ethical bias. Any model for production must be carefully tested with fairness evaluation. One can have a look at what has been done by Google for their face detection models as an example.
What I do here is a pure image processing computation on the image. The idea is simple: given a target color and the average color of the rendered hand, I will simply compute the difference between those two colors. I will then apply this difference to the rendered hand to get the new skin tone:
As a result, it gives the following images of hands:
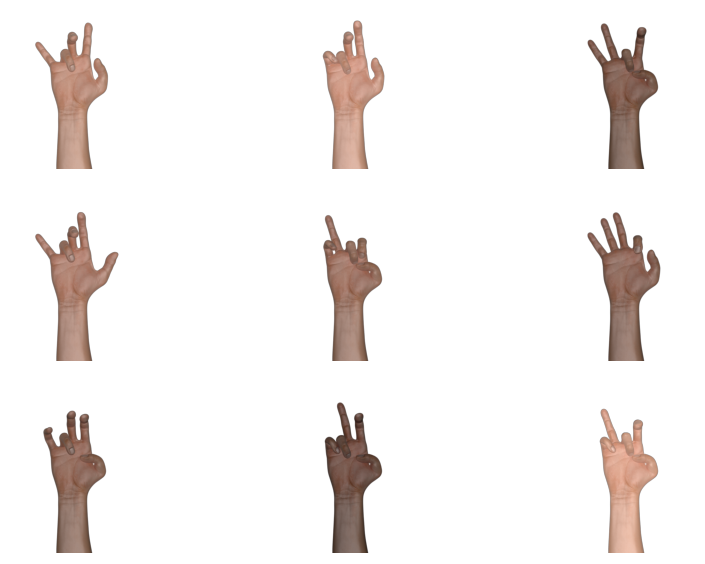
While the results are not perfect, they produce reasonably realistic images with diverse skin tones, using straightforward image processing. Only one step remains to have a diverse enough set of images: the rendering point of view.
Modifying the Camera Position
Finally, let’s adjust the camera positions to capture hands from multiple perspectives. To achieve this, the camera is located on a random point on a sphere centered around the hand. This can be easily achieved just by playing with the two angles of spherical coordinates. In the following code I generate a random position on a sphere:
Then, using this and adding a few constraints on the spherical location, I can update the camera position around the hand with Blender:
As a result, we now get the following sample of images:
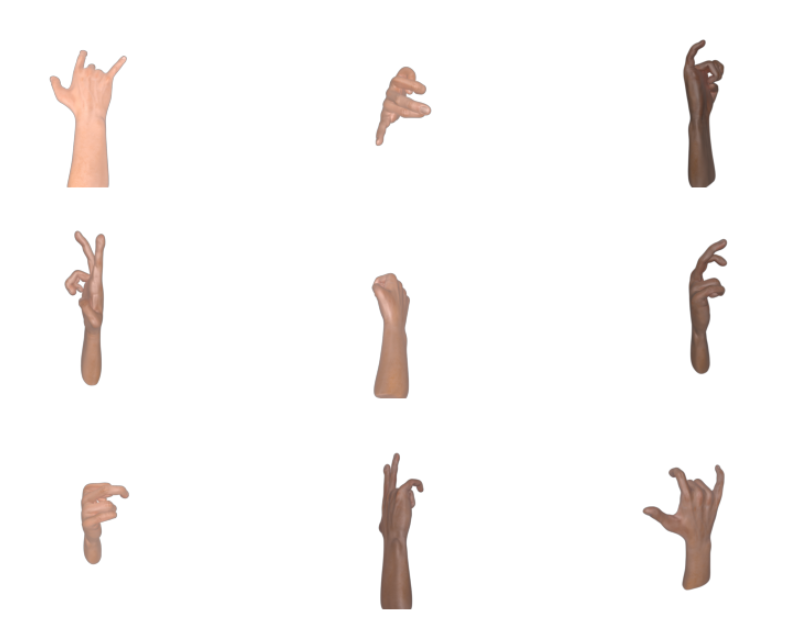
We now have hands with diverse finger positions, skin tones and from various point of views. Before training a segmentation model, the next step is to actually generate images of hands in various background and contexts.
Generating the Training Data
To generate diverse and realistic enough images, we are going to blend our generated hands with a set of selected background images.
I took images on Unsplash, free of rights as background images. I ensured that these images contained no hands. I will then randomly add the Blender-generated hands on these background images:
This function, although long, does simple actions:
- Load a random hand image and mask
- Load a random background image
- Resize the background image
- Pick a random position in the background image to put the hand
- Compute the new mask
- Compute the blended image of the background and hand
As a result, it’s rather easy to generated hundreds or even thousands of images with their labels for a segmentation task. Below is a sample of the generated images:
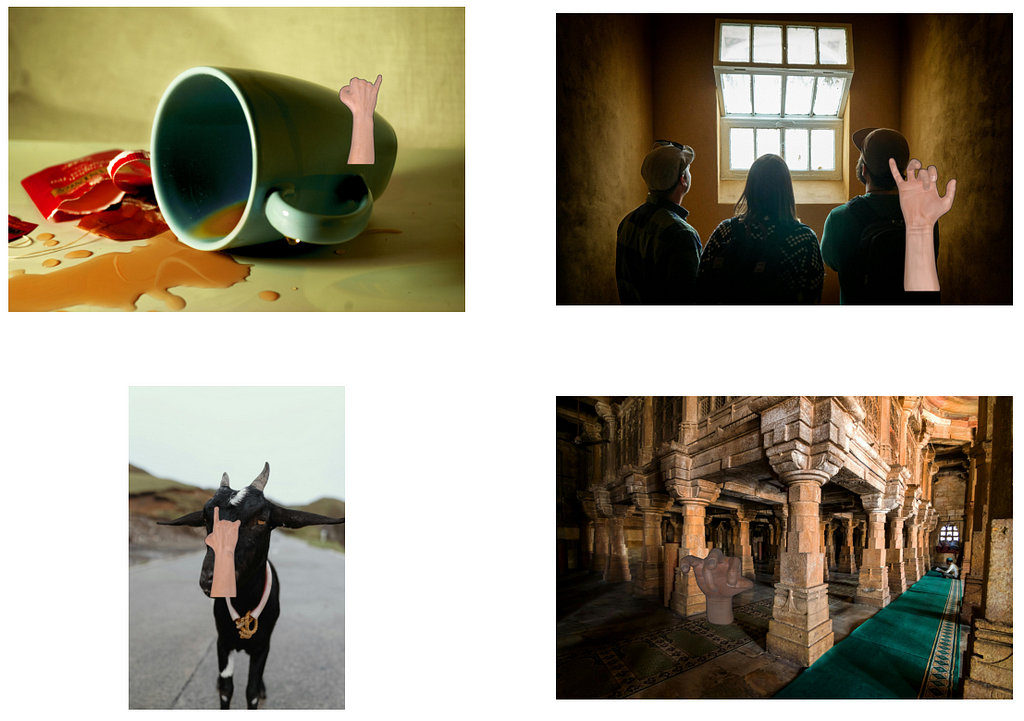
With these generated images and masks, we can now move on to the next step: training a segmentation model.
Training and Evaluating the Segmentation Model
Now that we have generated the data properly, let’s train a segmentation model on it. Let’s first talk about the training pipeline, and then let’s evaluate the benefits of using this generated data.
Training the Model
We are going to use PyTorch to train the model, as well as the library Segmentation Models Pytorch, that allows to easily train many segmentation models.
The following code snippet allows the model training:
This code does the typical steps of a model training:
- Instantiate train and valid datasets, as well as the data loaders
- Instantiate the model itself
- Define the loss and optimizer
- Train the model and save it
The model itself takes a few input arguments:
- The encoder, to pick from this list of implemented models, such as a MobileNetV3 that I’m using here
- The initialization weights on the ImageNet dataset
- The number of input channels, here 3 from RGB since we use color images
- The number of output channels, here 1 since there is only one class
- The output activation function: a sigmoid here, again since there is only one class
The full implementation is available on GitHub if you want to know more.
Evaluating the Model
In order to evaluate the model, and the improvements from the blended images, let’s make the following comparison:
- Train and evaluate a model on the Ego Hands dataset
- Train and evaluate the same model on the Ego Hands dataset, with our blended-generated data added to the train set
In both cases, I’ll evaluate the model on the same subset of the Ego Hands dataset. As an evaluation metric, I’ll use the Intersection over Union (IoU) (also referred as Jaccard Index). Below are the results:
- On the Ego Hands dataset alone, after 20 epochs: IoU = 0.72
- On the Ego Hands dataset + Blender-generated images, after 20 epochs: IoU = 0.76
As we can see, we could get a significant improvement, from 0.72 to 0.76 in the IoU, thanks to the dataset made of Blender-generated images.
Testing the Model
For anyone willing to try out this model on their own computer, I also added a script to the GitHub, so that it runs in real-time on the webcam feed.
Since I trained a relatively small model (MobileNetV3 Large 100), most modern laptops should be able to run this code effectively.
Conclusion
Let’s wrap this article up with a few key takeaways:
- Blender is a great tool that allows you to generate realistic images under diverse conditions: light, camera position, deformation, etc…
- Leveraging Blender to generate synthetic data may initially require some time, but it can be fully automated using the Python API
- Using the generated data improved the performance of the model for a semantic segmentation task: it improved the IoU from 0.72 up to 0.76
- For an even more diverse dataset, it’s possible to do that with more Blender hand models: more hand shapes, more textures could help the segmentation model generalize even more
Finally, if you manage to have a working model and would like to find the best strategy to deploy it, you can have a look at this guide:
How to Choose the Best ML Deployment Strategy: Cloud vs. Edge
As a side note, while this article focuses on semantic segmentation, this approach is adaptable to other computer vision tasks, including instance segmentation, classification, and landmark prediction. I would love to hear other potential usages of Blender that I may have missed.
References
Here are some references, even though they are already mentioned within the article:
- OpenCV
- MobileNetV3
- Segmentation Models PyTorch used for training
- Blender and its Python API
- The Ego Hands Dataset
Scaling Segmentation with Blender: How to Automate Dataset Creation was originally published in Towards Data Science on Medium, where people are continuing the conversation by highlighting and responding to this story.
from Datascience in Towards Data Science on Medium https://ift.tt/Oki5Py0
via IFTTT


